October 27, 2014

Miniature Steampunk Pipe Tutorial in 1:12 scale

Today I've been trying to make some 1:12 scale pipes. I saw a wonderful tutorial using styrene rods. Since I didn't have any at home I decided to try making them with things I already had. After finishing the first few pipes I was amazed by how good they looked and so I decided to share my technique with you.

So without further ado....

Miniature Steampunk Pipe Tutorial

I would just like to point out here that this is only one way of making pipes and I certainly didn't discover anything new. I'm sure there are a lot of other great tutorials out there but this is the way I made the pipes you see on the picture and for anyone else who wants to try this I decided to share my technique. The reason I like these technique so much is that you can make them from items most of us have at home.


You will need: 
- straws
- glue
- scissors
- scalpel
- brush
- an old rag
- 4 mm wide strips of paper (I printed mine out but you can easily just mark them with a ruler)
- black acrylic paint
- copper patina *optional* (I decided I wanted copper pipes but if you want them to look different just pick the desired colour)


These are the colours I used - plain acrylic colour in black and copper patina.


First decide what kind of pipe you would like to make. Cut your straws to the desired length. Unless you wish to make a broken pipe you will need at least two bends which means two straws.


Bend the straws.


You have to play around with the corner to get it at a 90 degree angle. Next cut a strip of paper. It doesn't really matter how wide the strip will be. We need this to help keep both straws together.


Roll the strip together just wide enough to fit into the straws. If you're having trouble rolling the paper use a toothpick and roll the paper around the toothpick. Try not to glue it together at the end so that when you insert it in the straw it will expand a bit and stick to the walls.


Put some glue in both ends of the straws where you want them to connect. Insert the roll first on one side of the straw and connect the other straw. Like I said, it's better not to glue the roll together to allow it to expand. It doesn't matter if it looks messy since it won't even be seen. You can still see how the pieces are connected, but not for long. Leave to dry.


Now cut the 4 mm wide strips of paper. For this particular pipe you will need four. You can always make these strips a different width for different designs.


Start wrapping the paper strips around the pipes. Pipes usually have rings where they are connected, which is at every bend. Decide where you want to put the rings and start gluing. I suggest coating about 2 cm of your paper strip with glue and start wrapping. Then put a dot of glue half way through and then again at the end. I don't think you would need to glue the entire strip but it would work just the same.


My pipe has all the rings and is ready for painting. Notice that I put a ring where we connected the two straws. It's a nice way to cover the gap. If you don't want the ring as low you could always just cut the straw closer to the bend.


Paint the entire surface with black acrylic paint. You could probably use spray paint instead but I just used regular acrylic paint and a brush. Leave it to dry completely.


Next add a coat of your choice of colour. As I said I wanted copper pipes. I didn't have any acrylic paint in copper but I did have some patina so I just used that. Now is the time to decide what kind of look you want for your pipes. If you want them shiny and new then just paint the desired colour and you're done. As it turns out I wanted old dirty pipes. I applied the patina quite heavily but the black paint still showed through. Since I wanted dirty pipes it wasn't a problem.


A close-up of the pipes. Now it's time to make them dirty. Fun!


After adding two washes of black acrylic paint this is how they look. Dilute a bit of black paint in water and start painting. Have a rag ready and blot off most of the paint. Leave it to dry completely and repeat the process until you get the desired look. I did two washes but didn't blot off the second one quite as heavily.


If looks quite different from the other close-up, right? I love that it looks dirty and used but you can always finish it any way you like.

One thing I still want to try is adding rust to pipes. You could try adding verdigris to copper pipes (since they don't rust) or make other types of pipes and add rust. Jane over at Minifanaticus has a great tutorial on rust. I will definitely be making more pipes and trying out Jane's tutorial.


This is how they look in my corner setting. Who would have thought that a little while ago they were just straws? For making the pipes stick to the walls better make another paper roll for each side and glue it in. This way there will be a little more surface to stick to the walls. 


You can use these in a variety of settings. If you leave them shiny and new they would be great for a more modern house. You could use them in a warehouse or for exteriors. I think the copper ones would work great for steampunk projects or fantasy settings. 


Well, this is it. You have made your pipes, now all you have to do is add them to your setting.


If any questions arise I will be more than happy to answer them. Also if anyone will try this I'd love to see the results!

Happy crafting!

*Poof*


October 24, 2014

Turning miniature pieces can be done on a big lathe too :)

First of all I would like to thank each and every one of you for taking the time to comment on my blog and to everyone for all of your wonderful wishes and lovely comments on pictures from our wedding.

Well, things seem to have calmed down a bit on my end. Now with the wedding over and all the details taken care of after the wedding I have more time for miniature projects.

I have finally convinced my father to let me try turning miniature pieces on his big lathe! After 2 years of convincing he finally gave in. And I couldn't be happier! It's actually the same as a tabletop lathe, the only difference is that I have to stand when I work. And now I can stop drooling all over tabletop lathes every time we go to the hardware store :)

After a crash course in safety on the big lathe and how to handle the chisels I am now successfully making miniature turnings! Yaaaay!

My first attempt was a bit timid from all the years my father spent saying that his big machines were scary and not for me :P I think he used to say that when I was little, because even then I was always curious about everything and his machines always fascinated me - and you know how kids are when something interests them.... of course he had to scare me a bit so I wouldn't be tempted to try turn one on, hehehe

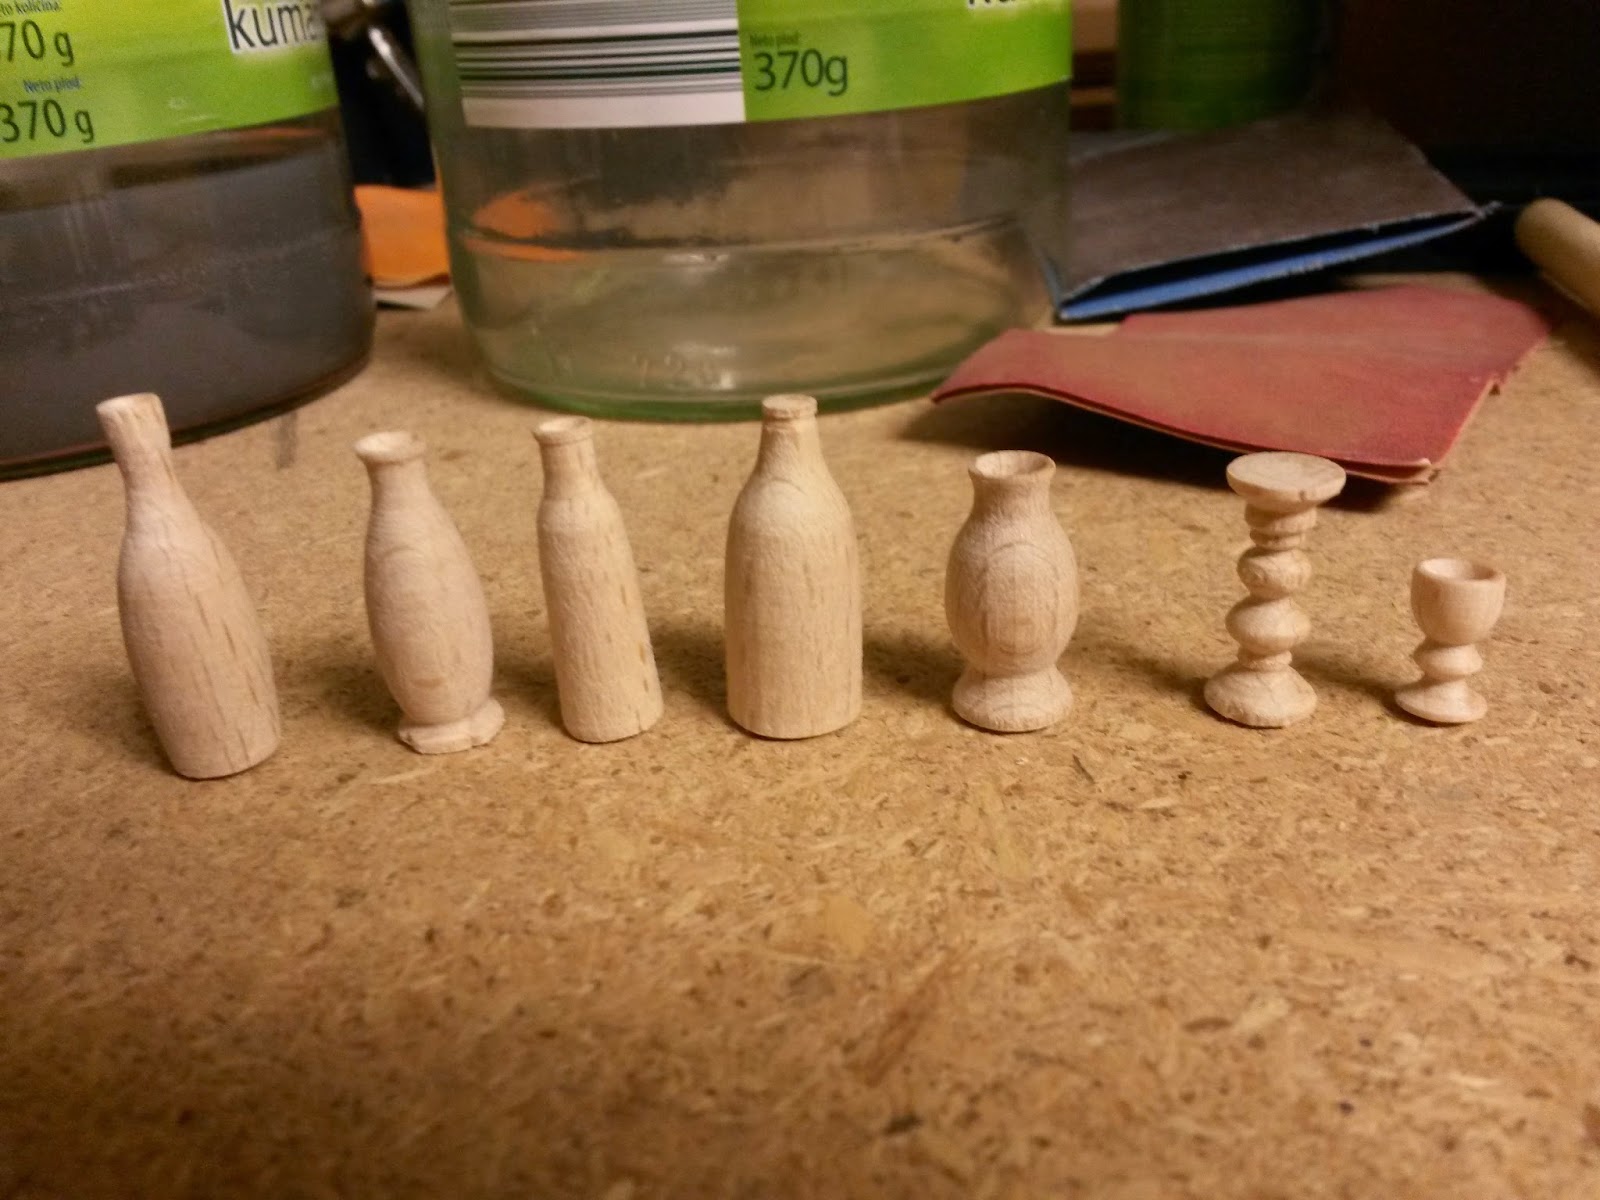
Anyway, after the first bottle was done I got a bit bolder and tried new shapes. I'm not afraid of the lathe anymore and now I can make so many different items. For now I can only make things from pre-made poles. We had a part made so I will be able to turn table legs and such. My father has parts that are for turning bigger things and so we needed something smaller. We're still waiting for that but hopefully we'll get it next week.

The big and scary lathe :)


First batch of turnings. For some reason I wanted to make bottles.... the fourth bottle is my first try. I was still very scared to put the chisel to the wood and it shows. It's too bulky and it doesn't look good at all. The next pieces are progressively better though.... I'm no expert by a long shot but at least things are starting to look somewhat normal.

And a batch of candle stands. There are so much fun to make! I can't wait to make some more!

As you can see I still have a lot to learn when it comes to turning wood.... and miniatures in general. But I'm having fun creating and learning!

***********

In other news.... my father and I also did some work on my Victorian shop. 

We put the carcase together. I searched all over on the best ways for applying wallpaper and there are a lot of different opinions.... But in the end I decided we should just put the entire thing together and I'll wallpaper it then.

The front of the house. It's starting to look good! It still needs a lot of ageing and distressing but so far so good.

We also added the side columns. It totally changes the entire front.

The ground floor ceiling. The only thing I made before we assembled the house. I'm probably going to regret not doing the upper ceiling before but I don't have anything special planned for that one. Will probably just paint it before wallpapering. But I love how this one turned out!

I couldn't resist taking a shot through the window :) You can also see some of the ceiling. I can't wait to start putting furniture in! Everything is going to be very nicely visible though the window. 

I'd love to know what you all think - both about the turnings and the house. 

Now I have a question.... does anyone have any advice on how to make an aged setting. Both inside and outside. Or does anyone perhaps know of a site that explains it a bit? I'd love to see some distressing tutorials and such, to get the most realistic effects. I tried searching on the web but uncle Google came up empty handed. Or I didn't search for the right phrases. And tips and suggestions will be greatly appreciated.

Until next time!

*Poof*


October 9, 2014

The big day!!.... and after...

Hello everyone! Well, the big day came and went :) We had a wonderful day and made some wonderful memories. It was truly the perfect wedding and we couldn't have wished for anything more. Everything went smoothly and just like we planned. I loved my wedding dress, I felt like a princess the whole day. Not to mention that my darling husband brought me the most perfect wedding bouquet imaginable! Of course being married in a castle didn't hurt either, hahaha.

Although I don't usually post personal pictures a lot of you wished to see some photos of our big day so here are a few teasers. You can see our whole wedding story and a lot more pictures on Inaya's Blog. I'd just like to say here that she was perfect and we are more than happy with how the pictures turned out. We chose the best photographer and are very proud she was part of our wedding.


************

Things are starting to settle down after the wedding and I've had some time this week for minis. I've decided to try and make some serving trays. 


I'm very pleased with how they turned out. Perhaps I'll add another project to my ever growing list - a shabby chic shop or cafe... *sigh*

I've also added them to my Etsy shop so if anyone is interested you can find the there.


And of course since Halloween is approaching with lightning speed I couldn't forget some witchy accessories. So, without further ado, I'm proud to present..... PUMPKIN JUICE!!! 

I like how the little pumpkin lids turned out, perhaps a bit too large but I'm satisfied with the overall result. The thing I'm not satisfied with are the bottles. I made each of them by hand from Fimo and so each is a bit different. And perhaps the bottles are too shiny.... will have to try again, right? But these are good enough to sit in a corner of a scene somewhere :)

It's that time of the year where I usually have more time for my hobbies and I hope to have some more regular updates. Perhaps even a Halloween giveaway? *wink wink*

Until next time!

*Poof*