Showing posts with label scene. Show all posts

October 24, 2014

Turning miniature pieces can be done on a big lathe too :)

First of all I would like to thank each and every one of you for taking the time to comment on my blog and to everyone for all of your wonderful wishes and lovely comments on pictures from our wedding.

Well, things seem to have calmed down a bit on my end. Now with the wedding over and all the details taken care of after the wedding I have more time for miniature projects.

I have finally convinced my father to let me try turning miniature pieces on his big lathe! After 2 years of convincing he finally gave in. And I couldn't be happier! It's actually the same as a tabletop lathe, the only difference is that I have to stand when I work. And now I can stop drooling all over tabletop lathes every time we go to the hardware store :)

After a crash course in safety on the big lathe and how to handle the chisels I am now successfully making miniature turnings! Yaaaay!

My first attempt was a bit timid from all the years my father spent saying that his big machines were scary and not for me :P I think he used to say that when I was little, because even then I was always curious about everything and his machines always fascinated me - and you know how kids are when something interests them.... of course he had to scare me a bit so I wouldn't be tempted to try turn one on, hehehe

Anyway, after the first bottle was done I got a bit bolder and tried new shapes. I'm not afraid of the lathe anymore and now I can make so many different items. For now I can only make things from pre-made poles. We had a part made so I will be able to turn table legs and such. My father has parts that are for turning bigger things and so we needed something smaller. We're still waiting for that but hopefully we'll get it next week.

The big and scary lathe :)

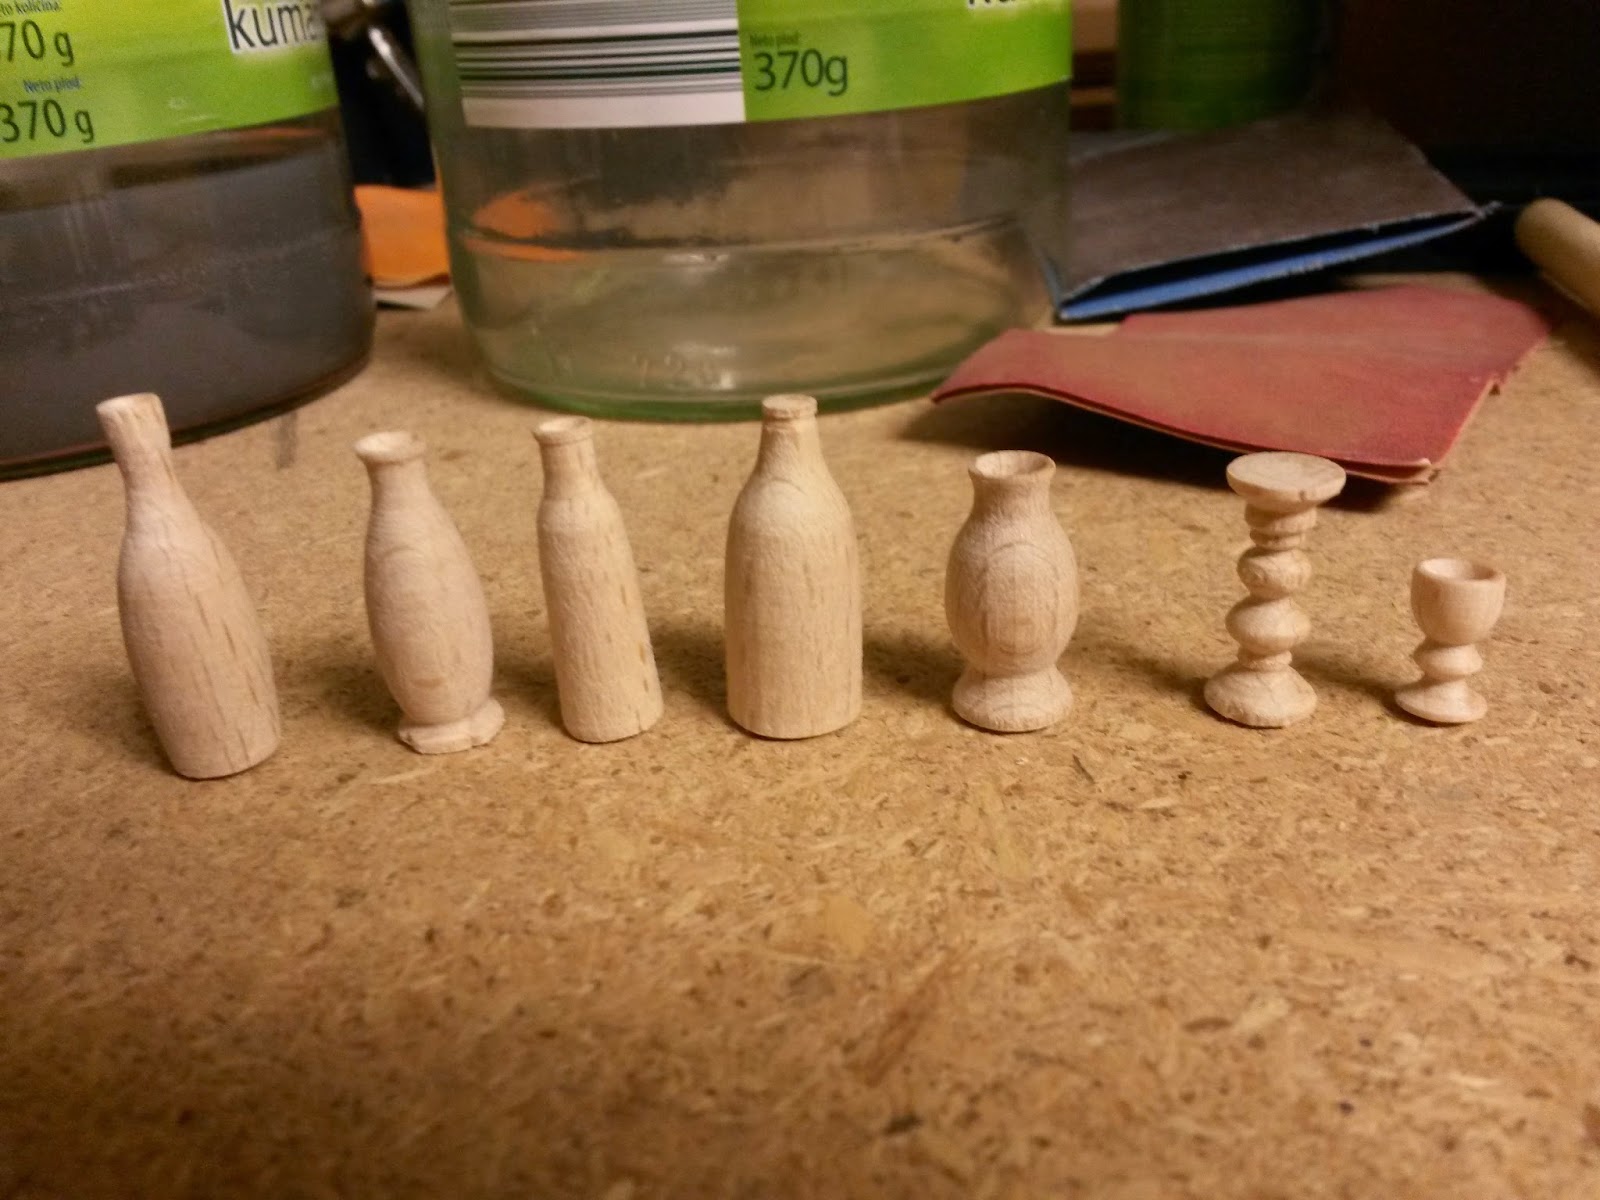
First batch of turnings. For some reason I wanted to make bottles.... the fourth bottle is my first try. I was still very scared to put the chisel to the wood and it shows. It's too bulky and it doesn't look good at all. The next pieces are progressively better though.... I'm no expert by a long shot but at least things are starting to look somewhat normal.

And a batch of candle stands. There are so much fun to make! I can't wait to make some more!

As you can see I still have a lot to learn when it comes to turning wood.... and miniatures in general. But I'm having fun creating and learning!

***********

In other news.... my father and I also did some work on my Victorian shop. 

We put the carcase together. I searched all over on the best ways for applying wallpaper and there are a lot of different opinions.... But in the end I decided we should just put the entire thing together and I'll wallpaper it then.

The front of the house. It's starting to look good! It still needs a lot of ageing and distressing but so far so good.

We also added the side columns. It totally changes the entire front.

The ground floor ceiling. The only thing I made before we assembled the house. I'm probably going to regret not doing the upper ceiling before but I don't have anything special planned for that one. Will probably just paint it before wallpapering. But I love how this one turned out!

I couldn't resist taking a shot through the window :) You can also see some of the ceiling. I can't wait to start putting furniture in! Everything is going to be very nicely visible though the window. 

I'd love to know what you all think - both about the turnings and the house. 

Now I have a question.... does anyone have any advice on how to make an aged setting. Both inside and outside. Or does anyone perhaps know of a site that explains it a bit? I'd love to see some distressing tutorials and such, to get the most realistic effects. I tried searching on the web but uncle Google came up empty handed. Or I didn't search for the right phrases. And tips and suggestions will be greatly appreciated.

Until next time!

*Poof*


April 18, 2014

My miniatures through the eyes of a professional photographer

Remember the amazing photos my friend took of my minis? Well, she sent me a new round. Again, I was speechless when I saw them. My fiance said they're worth more than gold since they got me to shut up for a few minutes, hahah. He was kidding.... I think he was kidding.... I hope he was kidding, hahha.

I would like to thank everyone for the lovely comments. It means so much to know that people enjoy my work since I love sharing my process and end results with all of you.

Of course these photos were again taken by the fabulously talented Inaya. You can also find her on facebook. And now without further ado....


What do you think? Amazing, right? These are all things you've already seen on this blog. Isn't it interesting how they can look so much better this way? I don't think I'll ever stop admiring them :) Thank you again Inaya!!

In other news....

Recently I've had some time to set up a facebook page. You can find the link on the right side of this blog or just click here. Just in case you don't want to miss any blog updates or are curious to see more WIP photos. I have decided to post occasional snapshots of my worktable there that won't be on the blog. If you're interested head on over and take a look. I will also have another giveaway only for facebook in the very near future so keep an eye out for that also.


I wish everyone a very happy Easter with lots of colourful Easter Eggs :)


Well, until next time!

*Poof*

April 3, 2014

How another artist can transform your miniatures a.k.a. my miniatures photographed by a professional

A friend of mine offered to take pictures of my miniatures. She is a brilliant photographer and I think I should just let the pictures speak for themselves. 

You can see more of her work on her website Inaya or on her facebook page Inaya Portfelj.


All of these miniatures were made by me....can you believe it?! I almost didn't believe these are mine, hahaha. It's such a wonder how a talented person can present your miniatures in a totally different way!

Thank you again Ines for these amazing photos!!

Until next time!

*Poof*

June 9, 2013

Sorceress' study lantern aka birthday gift for my mum

Ok, I admit, I broke my promise. But I did have a good reason - my mum's birthday. Granted it's not until the 20th but I just had to make her gift now. I did write a few more pages of my thesis though so I decided to reward myself with some mini-ing :)

Remember that lantern I showed you a couple posts back? Well, it was meant for my mum's birthday anyway but I didn't exactly know what I'd put inside. This is what I came up with....

Before I added the back "wall". Everything on the table is glued on. If you look closely you will see many of my creations from the past year. Everything here is handmade by me (except the kitty and bottles, which I bought but filled myself).

One of the books from my Burnt Owl Book range, a wand, some test tubes, potions,..... Everything a respectable witch needs!

And this is the final product. I added the back since I wanted a hanging shelf which I decorated with some potions. And yes, I know, horrible pictures again. I had to take these with my boyfriend's phone since the battery on mine died and also the battery on our camera. Like it didn't want to get photographed!

I love the little kitty on the right! 

I finished everything today and me being me I couldn't wait two more weeks to give this to my mum. I gave it to her today and she was super thrilled. Thank god she loved it! I really like how it turned out too. The only thing that's bugging me a bit is possible dust in the future. As we all know dust is our worst enemy in minis. I couldn't get the door to close any other way and so I'm a bit worried that after a while dust might start settling on the inside, but other than that I love it!!

Ok, now I'll be good and finish my thesis.... at least as far as I can get without another consultation with my mentor. 

Until next time!

*Poof*